How can I add Clients to TaxPay?
Inviting Clients to TaxPay: A Step-by-Step Guide
- From your dashboard, locate and click on "Add Client."

- Enter the client's basic information such as company name, full name, and email. Then, save your changes. After saving, you'll be directed to the client information page.

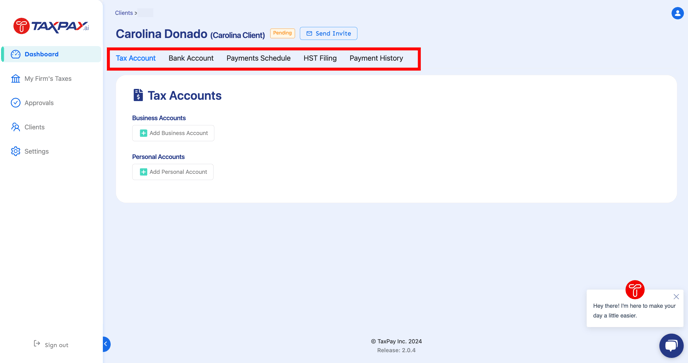
- At the top of the page, you'll find the client's name and a "Pending" status, showing that the client invite has not been sent yet. You can easily send the invite by clicking on the "Send Invite" button next to it. At the top, you'll see the client's name and a pending status (indicating that the client invite hasn't been sent yet), along with the "Send Invite" button.
- You'll also notice different tabs such as Tax Account, Bank Account, Payment Schedule, and HST Filing and Payment History.
Note: You need to add the client tax account before scheduling payments.

Once you have more clients you can easily view your list of clients and their status by accessing the "Manage Clients" tab under the clients section.
For further details on managing clients, you can refer to the article "Manage Clients Settings" for additional information.

👋 If you ever need help, please feel free to reach out to support@taxpay.ai. We're here to help you!
